Mapping ACF Custom Fields in Elementor: The Complete Integration Guide

You can seamlessly map ACF custom fields in Elementor to display dynamic content on your WordPress site—no advanced coding required. By linking ACF (Advanced Custom Fields) with Elementor, you unlock the ability to show user-generated or post-specific data directly in widgets, including map locations with OpenStreetMap. This integration transforms your site-building workflow, letting you create interactive, data-driven pages in minutes.
Why Mapping ACF Custom Fields in Elementor Changes Everything
Picture this: you’re building a directory of local businesses, event listings, or property maps. With plain Elementor, you can create beautiful layouts, but your content is static—every location, title, or description needs manual entry. That’s where ACF comes in.
ACF lets you store custom data for each post: addresses, coordinates, contact details, whatever you need. By mapping these fields into Elementor, you create pages that update automatically as your data changes. No more copy-pasting or redoing layouts. And if you add OpenStreetMap integration (with a plugin like Themecanvas), you can even plot these locations on a map, all without touching Google Maps or those pesky API keys.
If you’ve ever felt stuck copying the same map coordinates into every listing, or wished your site could just “know” what to display where—this guide is for you.
What You’ll Need Before You Start
Here’s a checklist to make sure you’re ready to roll:
- WordPress site with Elementor (free or Pro)
- Advanced Custom Fields (ACF) plugin installed and activated
- A map integration plugin (like Themecanvas) if you want OpenStreetMap capabilities
- At least one custom post type (or posts/pages) where you want dynamic fields
If you’re missing any of these, you’ll want to get them set up first. Don’t worry—none of this requires advanced technical skills. If you can install a plugin and create a post, you’re golden.
The Power of ACF: From Flat Content to Dynamic Data
Let’s break down why ACF is such a game-changer for Elementor users. Normally, WordPress posts and pages have a title, some text, maybe a featured image. But what if you want every listing to display its own address, phone number, or a set of coordinates?
ACF lets you define those extra fields—right from the WordPress dashboard. Think of it like adding new “blanks” to fill out for every post. You might create fields for:
- Street address
- City
- Postcode
- Latitude/Longitude
- Contact email
Now, every time you add a new listing, you just fill in those fields—no more hunting through the text editor or risking copy-paste errors. When you connect these fields in Elementor, you can display them anywhere in your design, automatically. That’s the magic of mapping ACF custom fields: your content becomes dynamic, future-proof, and far easier to manage as your site grows.
Setting Up Your First ACF Field Group (Without the Tech Headaches)
Creating custom fields with ACF is surprisingly painless. Here’s how to get started:
- In your WordPress dashboard, go to Custom Fields > Add New.
- Name your field group (e.g., “Business Location”).
- Click Add Field and choose a field type—start with “Text” for addresses or “Google Map” for coordinates (don’t worry, this works with OpenStreetMap plugins too).
- Set the field label, name, and instructions. Keep labels clear so you know what to enter later.
- Under Location, choose where this field group appears (e.g., posts, pages, or your custom post type).
- Publish the field group.
Now, when you edit a post, you’ll see your new custom fields—ready to capture all that valuable data.
Connecting ACF Fields to Elementor Widgets: Bringing Data to Life
Here’s where the real magic happens. Elementor (especially Pro) lets you pull in dynamic content—meaning you can connect any widget to your ACF fields. Here’s the workflow:
- Open the page or template you want to design in Elementor.
- Add a widget (like a Heading, Text, or Map widget).
- In the content panel, look for the Dynamic Tags icon (a stack of database disks).
- Click it and choose ACF Field from the list.
- Select the field you created earlier (e.g., “street_address” or “coordinates”).
- Watch as Elementor pulls in real post data—no hardcoding required.
Want to show different data for each post? Just fill out the custom fields for each listing. Elementor does the rest, updating layouts automatically as you add or edit content.
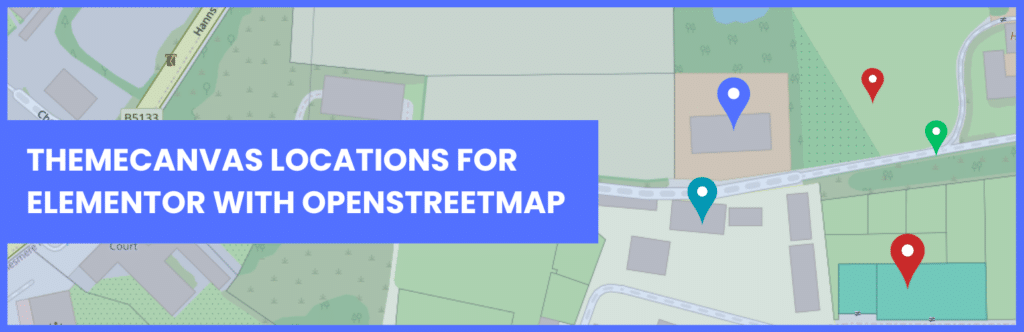
Mapping Locations: OpenStreetMap Integration Without Google API Headaches
If you’ve ever tried to get a Google Maps API key, you know it’s a maze of billing forms and developer jargon. That’s why more site builders are turning to OpenStreetMap—especially with plugins like Themecanvas, which slot right into Elementor.
Here’s how it works:
- You create an ACF field for addresses or coordinates (latitude/longitude).
- Themecanvas reads these fields and automatically places markers on an interactive OpenStreetMap.
- No Google account, no API billing, no hidden costs.
It feels almost magical: as you add new posts with location data, your site map updates automatically. You can customize marker icons, add pop-ups, and even display multiple locations—all using the data you’re already entering with ACF.
Real-World Example: Building a Business Directory With Dynamic Maps
Let’s walk through a scenario you might recognize. Say you’re building a local business directory. You want each business to show:
- Name and description
- Address and contact info
- Location on an interactive map
Here’s a quick play-by-play of how you’d set this up:
- Create a custom post type for “Businesses.”
- Use ACF to add fields: address, phone, latitude, longitude.
- Enter data as you add each business.
- In your Elementor template, add text widgets for each field (pulled in via Dynamic Tags).
- Drop in the Themecanvas map widget, set it to pick up your latitude/longitude fields.
- Now, each business post automatically shows the right info—and appears on the map with a custom marker.
No manual updates, no risk of missing data. Whenever you add a business, it’s instantly mapped and displayed beautifully.
Common Roadblocks (and How to Blast Through Them)
Let’s be honest: even with great tools, things can get confusing. Here are some pitfalls most users hit—and how to fix them fast:
- Fields not showing in Elementor: Double-check that your ACF field group is assigned to the right post type, and that you’re editing the right template.
- Map markers not appearing: Ensure you’ve entered valid coordinates, and that your map widget is set to pull from the correct fields.
- Data not updating: Remember, Elementor caches some data. Try clearing cache or refreshing your template.
- Styling quirks: Some map plugins give you full control over marker icons and popups—explore those settings so your design matches your brand.
Everyone runs into at least one of these. Don’t sweat it—you’re not alone, and each has a straightforward fix.
Advanced Techniques: Custom Post Types, Loops, and Multi-Location Maps
Once you’ve nailed the basics, the possibilities really open up. Want to display a full directory of properties, events, or shops on a single map? Here’s how:
- Custom Post Types: Use ACF to add unique fields to each type (e.g., “Event Date” for events, “Opening Hours” for stores).
- Elementor Loops: With Elementor’s Loop Builder (Pro), you can pull all posts of a type and display them dynamically—each with its own mapped location.
- Multiple Locations per Post: Some plugins and field types (like ACF’s Repeater field) let you store several sets of coordinates per post. Themecanvas can read these and plot multiple markers, perfect for franchises or events with several venues.
The trick is thinking through your data model first, then letting ACF and Elementor do the heavy lifting. You get a fully interactive, always-up-to-date site with zero manual map maintenance.
Table: Elementor Map Plugins—Feature Comparison
If you’re tired of Google API hoops, OpenStreetMap plugins like Themecanvas are a breath of fresh air. Choose one that matches your needs and budget.
How to Keep Your Dynamic Maps Fast and Reliable
Dynamic maps are powerful, but they can slow things down if you’re not careful. Here’s how to keep your site speedy:
- Limit map markers: Only display what’s needed—use filters or pagination for large datasets.
- Optimize images: Custom marker icons should be small and compressed.
- Cache wisely: Some plugins offer built-in caching. Use it, and clear it when updating lots of data.
- Test on mobile: Maps can behave differently on phones. Tweak popups and zoom levels for mobile-friendliness.
A fast, interactive map keeps users happy and encourages them to explore your content. Don’t let performance slip through the cracks.
When Should You Use ACF With Elementor Maps? Real-World Scenarios
Here’s where mapping ACF fields really shines:
- Local directories: Show restaurants, stores, or services with real-time maps.
- Property listings: Map every home, flat, or office with unique attributes.
- Event calendars: Display upcoming events and their venues visually.
- Tourist guides: Plot attractions, walks, or routes with rich info popups.
- Multi-location businesses: List each branch on a single interactive map.
If your site depends on location data, or you want to turn static lists into living, breathing maps, this combo is a no-brainer.
Frequently Asked Questions
Q: Do I need Elementor Pro to use ACF fields in my designs?
A: You don’t need Elementor Pro for basic dynamic content, but advanced features—like the Loop Builder or custom templates—do require Pro. Most map integration plugins work with both versions, but double-check compatibility before starting.
Q: Can I use OpenStreetMap with ACF and Elementor, or am I stuck with Google Maps?
A: Absolutely! Plugins like Themecanvas let you use OpenStreetMap instead of Google Maps, so you avoid API keys and billing. Just set up your ACF fields for coordinates or addresses and connect them to your map widget.
Q: How do I display multiple map markers from a repeater or group field in ACF?
A: Some map plugins (like Themecanvas) read repeater or group fields and plot multiple markers per post. Make sure your widget supports this, and map each set of coordinates or addresses to the relevant field.
Q: Why aren’t my ACF fields showing up in Elementor’s dynamic tags list?
A: Check that your field group is assigned to the correct post type/template, and that you’re editing the page or post where those fields are available. Sometimes a quick page refresh solves it.
Q: Is it possible to style map markers and popups using Elementor?
A: With the right map plugin, yes! Themecanvas and similar tools let you customize marker icons, popup content, and even marker clustering—right inside Elementor, no code needed.
Q: Will dynamic maps slow down my site?
A: Not if you follow best practices: limit markers, optimize images, and use caching. Most modern map plugins are built for performance, but always test on mobile and desktop to make sure everything runs smoothly.
The Quick-Reference Checklist for Effortless ACF + Elementor Mapping
Before you dive into your next project, keep this workflow handy:
- Define your data: What do you need to show? (Addresses, events, properties?)
- Set up ACF field groups for every bit of info you’ll want dynamically.
- Choose a map plugin that supports OpenStreetMap and connects to ACF (like Themecanvas).
- Design your Elementor template, pulling in fields via Dynamic Tags.
- Test with sample data—check markers, info popups, and mobile views.
- Launch your site, knowing it will update effortlessly as your content grows!
With this roadmap, you’ll go from static to dynamic in no time, and your maps will never feel out of date again.