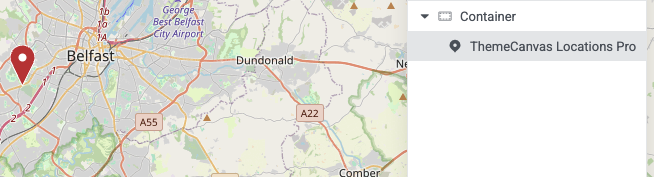
Manual Locations mode allows you to add location markers directly within the Elementor widget settings. This is the primary method for the Free version and is perfect for displaying a fixed set of locations like store locations, office addresses, or points of interest.
Adding the Widget
- Edit any page or post with Elementor
- In the left sidebar, search for “ThemeCanvas Locations” or find it under the “General” category
- Drag the widget onto your page
Widget Settings Overview
Location Source
Set the Location Source to Manual. This enables manual location entry mode.
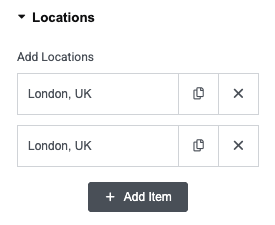
Adding Locations
- Click the Add Location button
- For each location, enter the following:
Required Fields
| Field | Description | Example |
|---|---|---|
| Latitude | Geographic latitude coordinate (-90 to 90) | 51.5074 |
| Longitude | Geographic longitude coordinate (-180 to 180) | -0.1278 |
Optional Fields
| Field | Description |
|---|---|
| Title | Location name shown in popup (e.g., “London Office”) |
| Description | Additional information displayed in popup. Supports HTML. |
Example: Adding a Location
Title: London Office
Latitude: 51.5074
Longitude: -0.1278
Description: Our main office in central London.
Open Mon-Fri, 9am-5pm.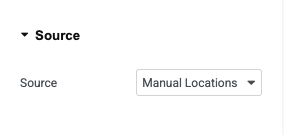
Popup Customization
Each location marker can display a popup when clicked. You can customize the content using HTML:
Basic Example
<h3>Store Name</h3>
<p>123 Main Street<br>
London, UK<br>
Phone: 020 1234 5678</p>
Advanced Example with Link
<h3>London Headquarters</h3>
<p>Visit us at our main office</p>
<a href="/contact" target="_blank">Get Directions</a>Managing Multiple Locations
You can add unlimited locations to a single map:
- Click Add Location to add more markers
- Drag and drop locations to reorder them
- Click the delete icon to remove a location
- Duplicate a location using the duplicate button

Sales
Lorem ipsum dolor sit amet, consectetur adipiscing elit. Ut elit tellus, luctus nec ullamcorper mattis, pulvinar dapibus leo.

Help & support
Lorem ipsum dolor sit amet, consectetur adipiscing elit. Ut elit tellus, luctus nec ullamcorper mattis, pulvinar dapibus leo.

Article & News
Lorem ipsum dolor sit amet, consectetur adipiscing elit. Ut elit tellus, luctus nec ullamcorper mattis, pulvinar dapibus leo.